
팀 프로젝트를 할 때 다른 팀원이 사용한 웹 에디터인데 UI가 깔끔하고 기능도 기본에 충실한 API라서 내 프로젝트에 적용하면서 사용법을 정리해보았다.
다른 CSS와 충돌하지 않게 lite 버전을 사용했다.
썸머노트 공식 홈페이지
Summernote - Super Simple WYSIWYG editor
Super Simple WYSIWYG Editor on Bootstrap Summernote is a JavaScript library that helps you create WYSIWYG editors online.
summernote.org
1. 소스 다운로드
Getting started 탭에 들어가면 소스를 다운 받을 수 있다.
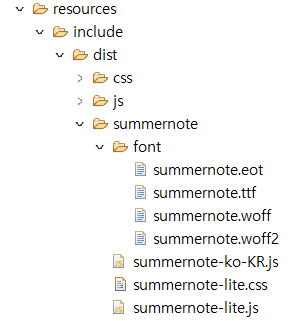
프로젝트 resources > include > dist > summernote에 복사
폰트는 font 폴더를 만들어서 복사했다.
2. javascript / css 추가
<script src="/resources/include/dist/summernote/summernote-lite.js"></script>
<script src="/resources/include/dist/summernote/summernote-ko-KR.js"></script>
<link rel="stylesheet" href="/resources/include/dist/summernote/summernote-lite.css">
3. html 작성
form 없이 썸머노트를 사용하려면 div에 적용시키면 된다.
<div id="summernote">Hello Summernote</div>form을 사용하는 경우 div에 적용하는 것보다 textarea에 적용하는 게 좋다.
또한 썸머노트의 값이 잘릴 수 있으므로 post를 사용해야한다.
<form method="post">
  <textarea id="summernote" name="editordata"></textarea>
</form>
4. 썸머노트 실행
$('#summernote').summernote({
  height: 300,                 // 높이, 설정하지 않으면 내용의 길이에 따라 길이가 변한다.
  minHeight: null,             // 최소 높이
  maxHeight: null,             // 최대 높이
  focus: true,                 // 썸머노트 초기화 후 썸머노트에 포커스를 맞출지 여부
  lang: 'ko-KR',	       // 언어를 한국어로 설정
});
여기에 툴바를 설정하면 폰트, 글자 크기와 글자 색을 변경 할 수 있다.
나는 한국어로 언어 설정과 placeholder까지 적용했다.
$('.summernote').summernote({
		toolbar: [
		    ['fontname', ['fontname']],
		    ['fontsize', ['fontsize']],
		    ['style', ['bold', 'italic', 'underline','strikethrough', 'clear']],
		    ['color', ['forecolor','color']],
		    ['table', ['table']],
		    ['para', ['ul', 'ol', 'paragraph']],
		    ['height', ['height']],
		    ['insert',['picture','link','video']]
		],
		fontNames: ['Arial', 'Arial Black', 'Comic Sans MS', 'Courier New','맑은 고딕','궁서','굴림체','굴림','돋움체','바탕체'],
		fontSizes: ['8','9','10','11','12','14','16','18','20','22','24','28','30','36','50','72'],
		height: 450,
		lang: "ko-KR",
		placeholder : "내용을 작성하세요."
	});
+ summernote로 이미지 업로드 하는 법
썸머노트는 Base64로 인코딩 후 저장하기 때문에 이미지 파일 코드가 길어진다.
긴 코드를 데이터베이스에 저장하고 싶지 않다면 callback 함수를 이용하면 된다. (그냥 저장하려면 데이터베이스 자료형을 clob이나 longtext로 지정하면 됨.)
callback 함수를 이용하여 이미지 파일을 서버에 별도로 저장하고 url을 리턴하는 방식으로 이미지를 업로드 할 수 있다.
1. pom.xml에 의존성 추가
<!-- commons-fileupload -->
<!-- multipart등을 사용할수 있음 -->
<dependency>
    <groupId>commons-fileupload</groupId>
    <artifactId>commons-fileupload</artifactId>
    <version>1.3.1</version>
</dependency>

<!-- https://mvnrepository.com/artifact/commons-io/commons-io -->
<!-- 대용량 파일 처리 -->
<dependency>
    <groupId>commons-io</groupId>
    <artifactId>commons-io</artifactId>
    <version>2.6</version>
</dependency>

<!-- https://mvnrepository.com/artifact/com.google.code.gson/gson -->
<!-- json 변환 -->
<dependency>
	<groupId>com.google.code.gson</groupId>
	<artifactId>gson</artifactId>
	<version>2.8.6</version>
</dependency>
2. 컨트롤러에 파일 업로드 로직 구현 및 servlet-context 설정
컨트롤러
@RequestMapping(value="/uploadImageFile", produces = "application/json; charset=utf8")
@ResponseBody
public String uploadImageFile(@RequestParam("file") MultipartFile multipartFile, HttpServletRequest request )  {
	JsonObject jsonObject = new JsonObject();

	// 내부경로로 저장
    // getRealPath 실제 톰캣이 돌아가고 있는 컴퓨터에서 그 곳의 절대 주소값 리턴
	String contextRoot = new HttpServletRequestWrapper(request).getRealPath("/");
	String fileRoot = contextRoot+"resources/fileupload/";

	String originalFileName = multipartFile.getOriginalFilename();	// 원래 파일명
	String extension = originalFileName.substring(originalFileName.lastIndexOf("."));	// 파일 확장자
	String savedFileName = UUID.randomUUID() + extension;	// 저장될 파일명

	File targetFile = new File(fileRoot + savedFileName);
	try {
		InputStream fileStream = multipartFile.getInputStream();
		FileUtils.copyInputStreamToFile(fileStream, targetFile);	//파일 저장
		jsonObject.addProperty("url", "/resources/fileupload/"+savedFileName); // contextroot + resources + 저장할 내부 폴더명
		jsonObject.addProperty("responseCode", "success");

	} catch (IOException e) {
		FileUtils.deleteQuietly(targetFile);	//저장된 파일 삭제
		jsonObject.addProperty("responseCode", "error");
		e.printStackTrace();
	}

	// json으로 리턴하면 오류나기 때문에 string으로 리턴
	return jsonObject.toString();
}
servlet-context multipart 설정
<!-- 스프링에서 기본으로 제공하는 multipartResolver는 CommonsMultipartResolver 이므로,
순수한 multipartResolver를 사용하기 위해 빈 이름으로 "multipartResolver"를 등록해야함 + 프로퍼티를 이용 최대 가능한 업로드 사이즈 지정함-->
<beans:bean id="multipartResolver" class="org.springframework.web.multipart.commons.CommonsMultipartResolver">
	<beans:property name="maxUploadSize" value="100000000"></beans:property>
</beans:bean>
3. 썸머노트 callback 함수 구현
$('.summernote').summernote({
		toolbar: [
		    ['fontname', ['fontname']],
		    ['fontsize', ['fontsize']],
		    ['style', ['bold', 'italic', 'underline','strikethrough', 'clear']],
		    ['color', ['forecolor','color']],
		    ['table', ['table']],
		    ['para', ['ul', 'ol', 'paragraph']],
		    ['height', ['height']],
		    ['insert',['picture','link','video']]
		],
		fontNames: ['Arial', 'Arial Black', 'Comic Sans MS', 'Courier New','맑은 고딕','궁서','굴림체','굴림','돋움체','바탕체'],
		fontSizes: ['8','9','10','11','12','14','16','18','20','22','24','28','30','36','50','72'],
		height: 450,
		lang: "ko-KR",
		placeholder : "내용을 작성하세요.",
        	// 이미지 업로드를 위한 콜백 함수
		callbacks : {
	    	onImageUpload : function(files, editor, welEditable){
	    		for(var i = files.length - 1; i >= 0; i--){
	    			uploadImageFile(files[i],this);
	    		}
	    	}
	    }
	});
	function uploadImageFile(file, el) {
		data = new FormData();
		data.append("file", file);
		$.ajax({
			data : data,
			type : "POST",
			url : 'uploadImageFile',
			contentType : false,	// false 로 선언 시 content-type 헤더가 multipart/form-data로 전송
			enctype : 'multipart/form-data',
			processData : false,	// false로 선언 시 formData를 string으로 변환하지 않음
            		// 업로드가 완료되면 썸머노트에 업로드 된 사진을 출력
			success : function(data) {
				$(el).summernote('editor.insertImage',data.url);
			}
		});
	}
완성~~

이미지 업로드 구현은 됐지만 내가 처음부터 코딩해야 했다면 정말 막막했을 것 같다. 지금도 100프로 이해하지는 못했음... 썸머노트 이미지 업로드 방법을 검색하던 중에 아주 도움이 되는 글을 발견해서 참고하여 작성했다!
'코딩 > 개발' 카테고리의 다른 글
| [API] lightpick 달력 라이브러리(2) (0) | 2023.11.29 |
|---|---|
| [API] lightpick 달력 라이브러리(1) (1) | 2023.11.28 |
| [CSS] media query 반응형 웹 만들기 (0) | 2022.11.10 |
| [아임포트 결제 API] 자바스크립트 / 카카오페이, 카드 결제 / 테스트 결제 (1) | 2022.10.06 |